Art 1123 | Design I
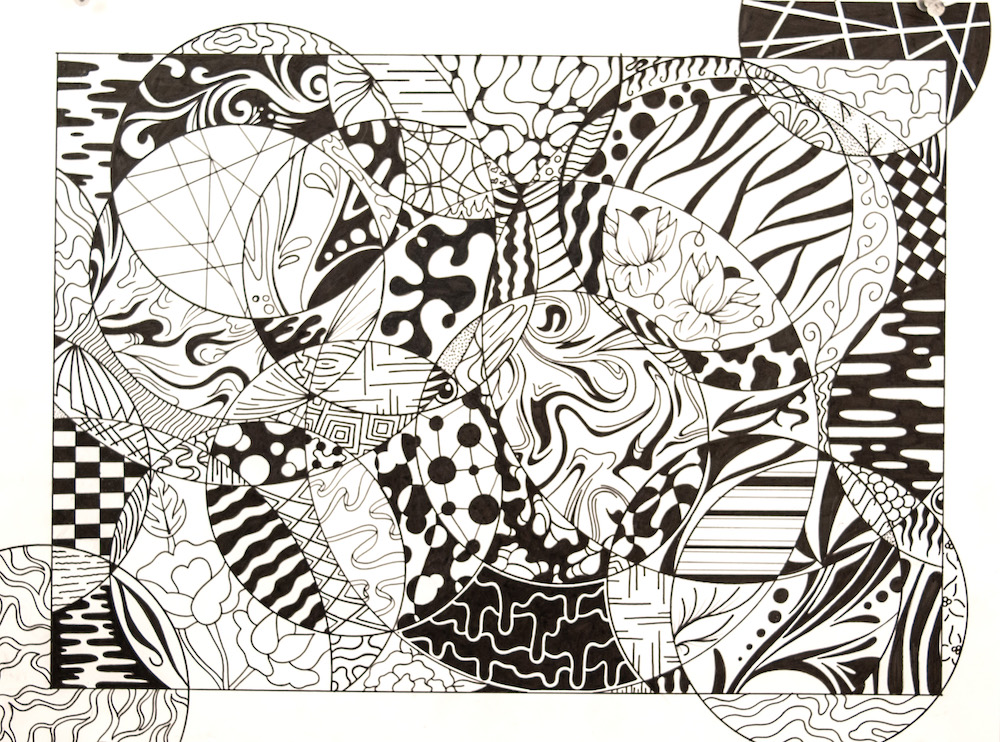
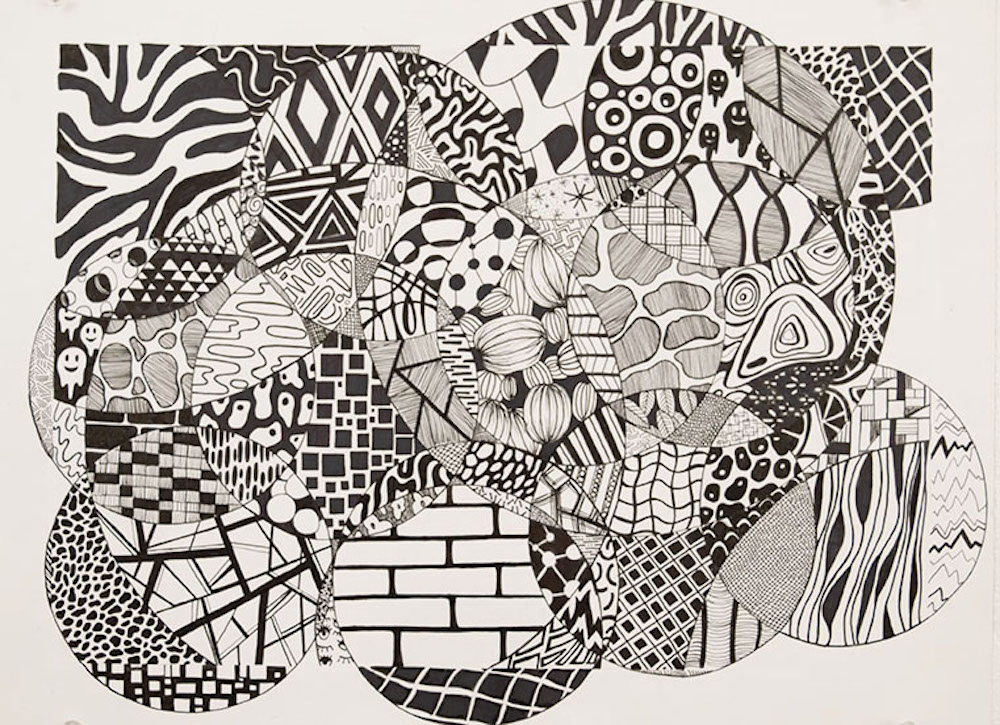
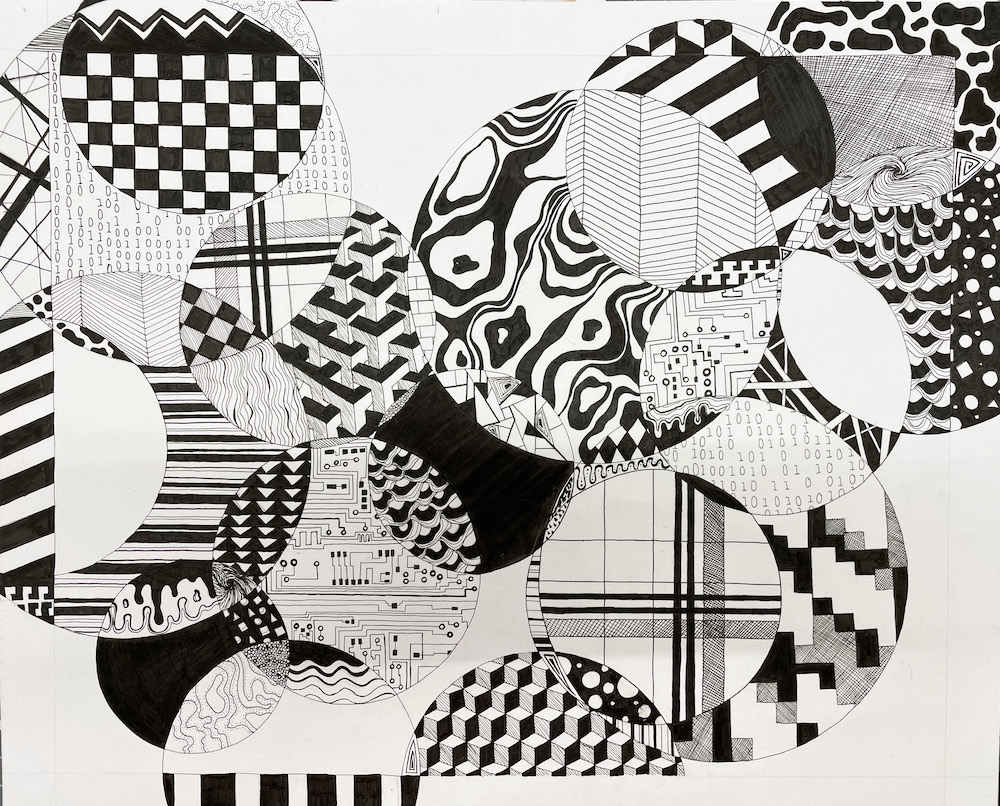
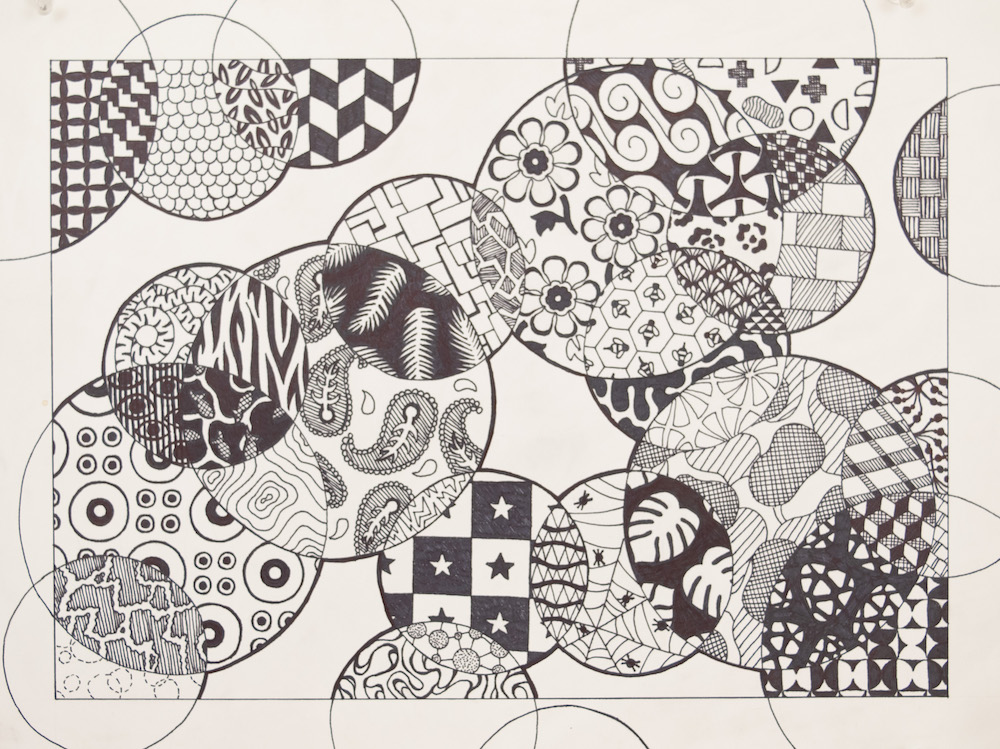
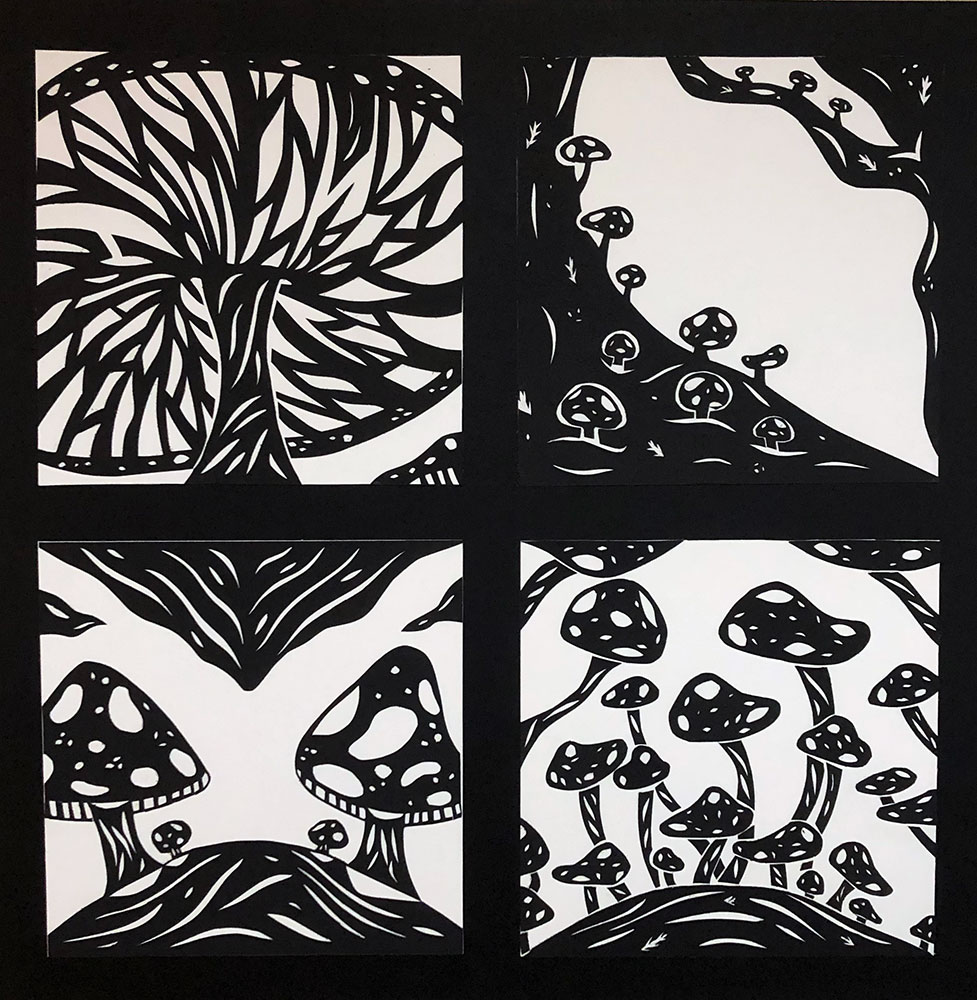
Rhythm, Repetition, Movement and Pattern
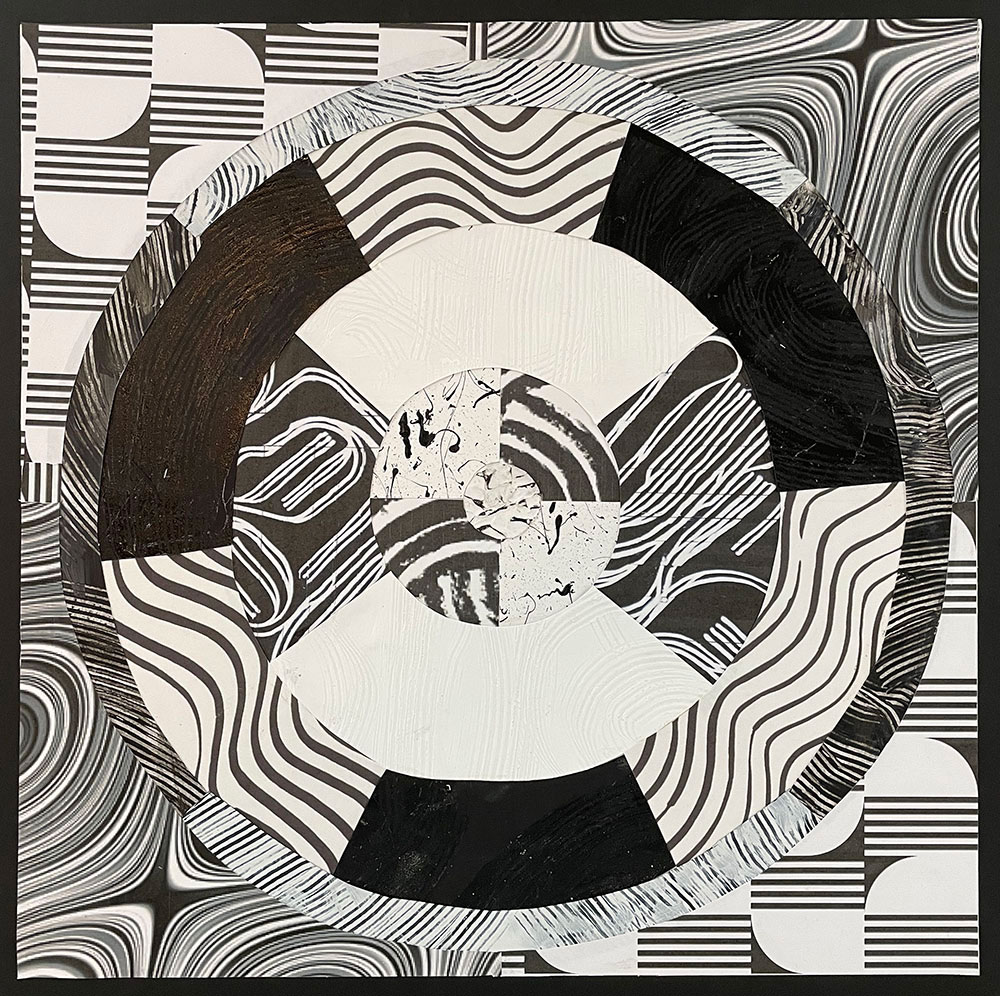
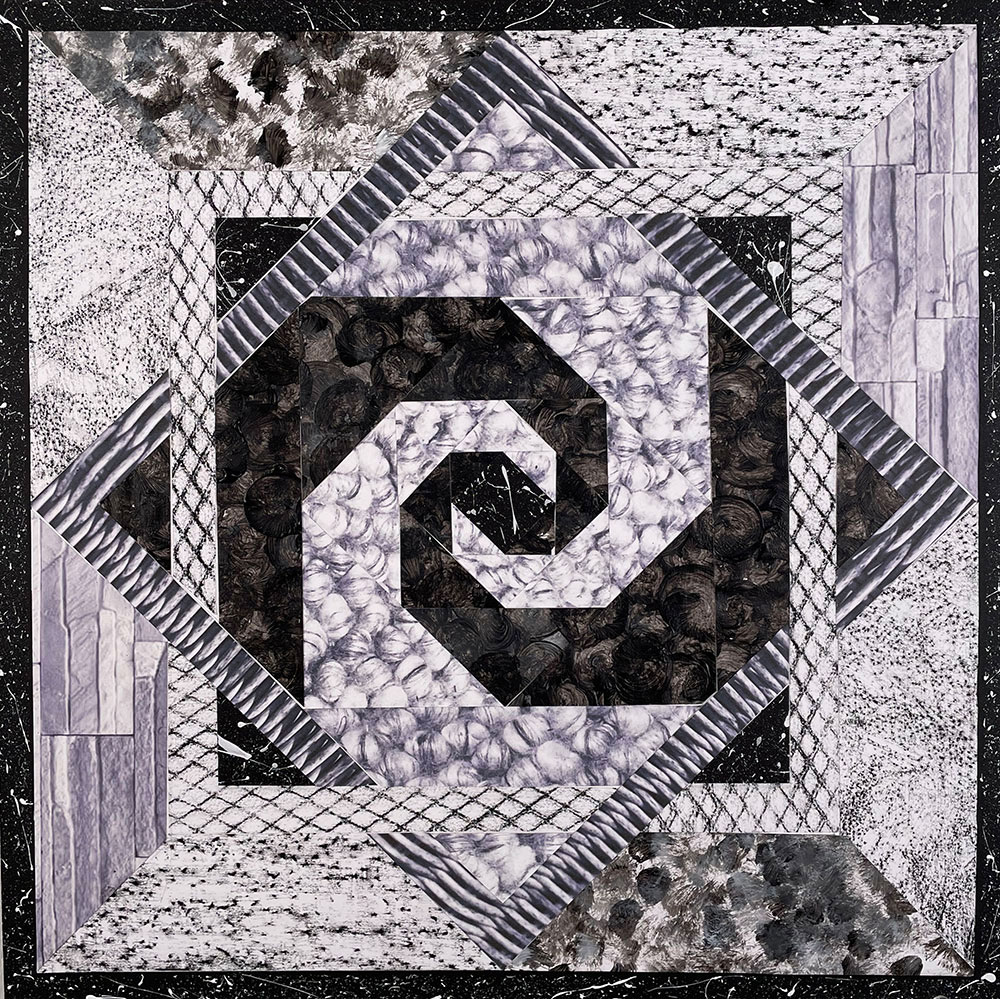
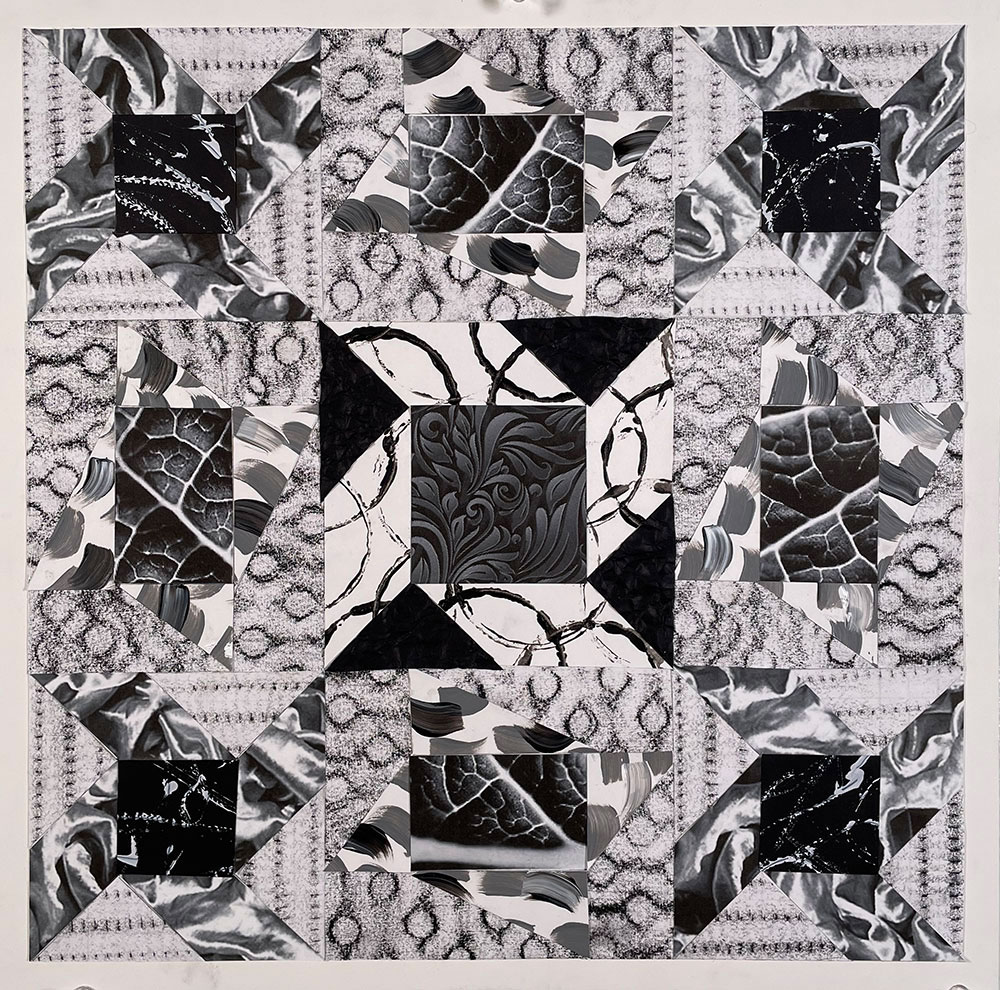
In this project the student should synthesize all that they have learned about the Elements and Principles of Design with a focus on Rhythm, Repetition and Pattern. After laying out their composition and completing the required visual research and gathering patterns. They will fill in the various shapes created by their compositions with their gathered patterns. They must keep balance in mind and pay attention to the arrangement of patterns in terms of their scale, value, and texture and use patterns with a variety of shapes and lines.
Design I is a six hour studio course that teaches a basic study of the fundamental elements and principles of design with an emphasis on composition.
Below are descriptions of some of the assignments in the course with student work examples.
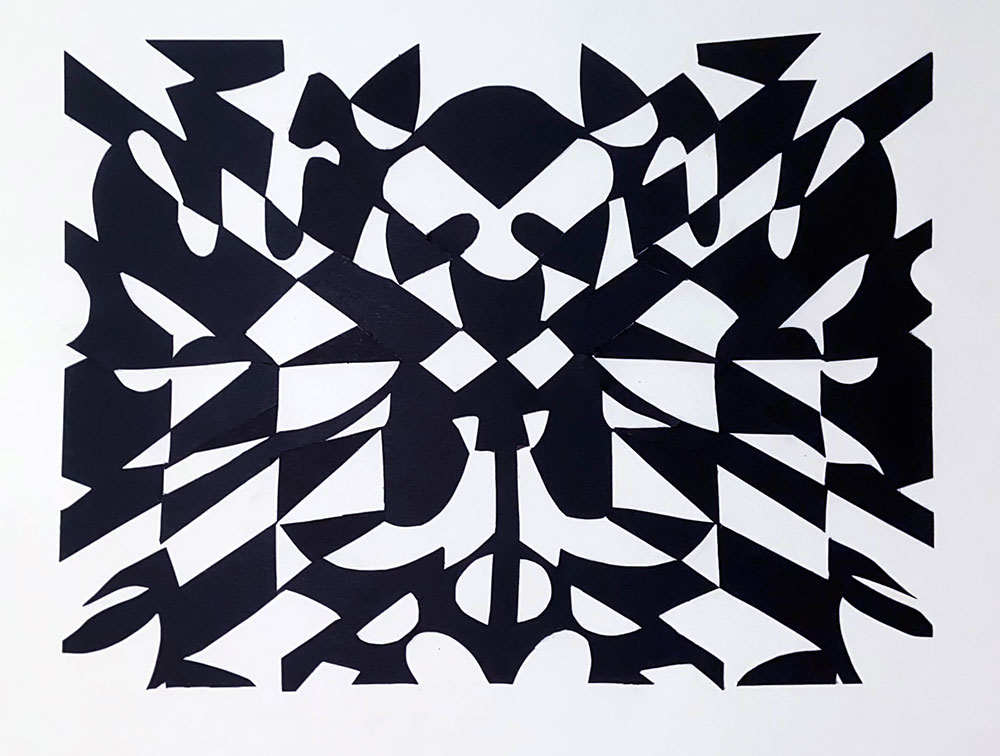
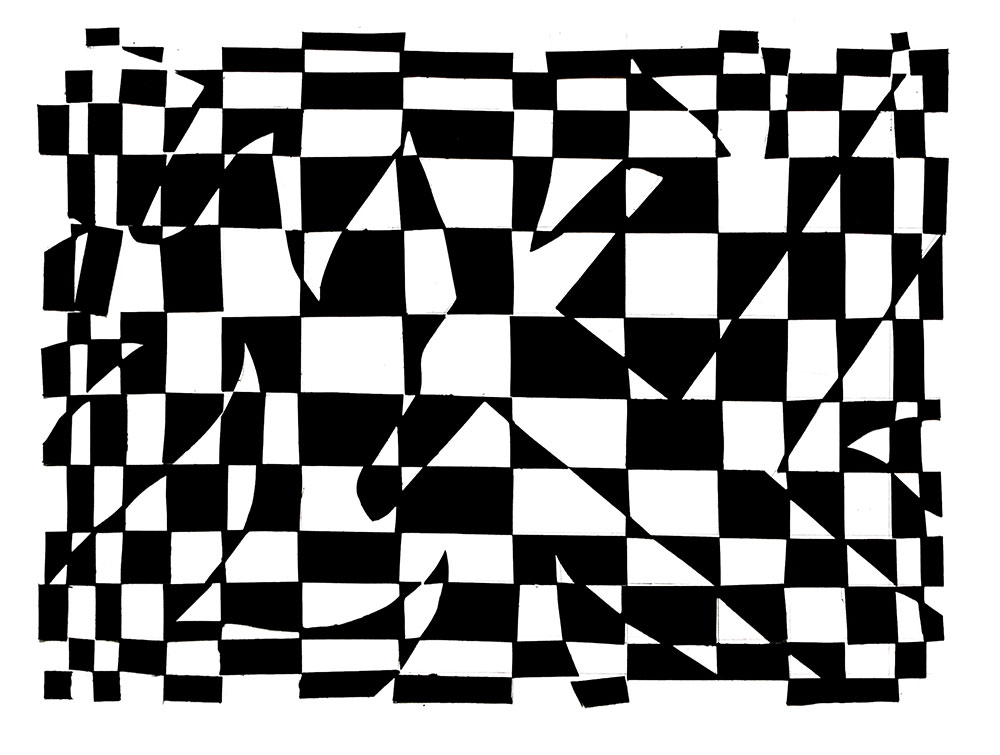
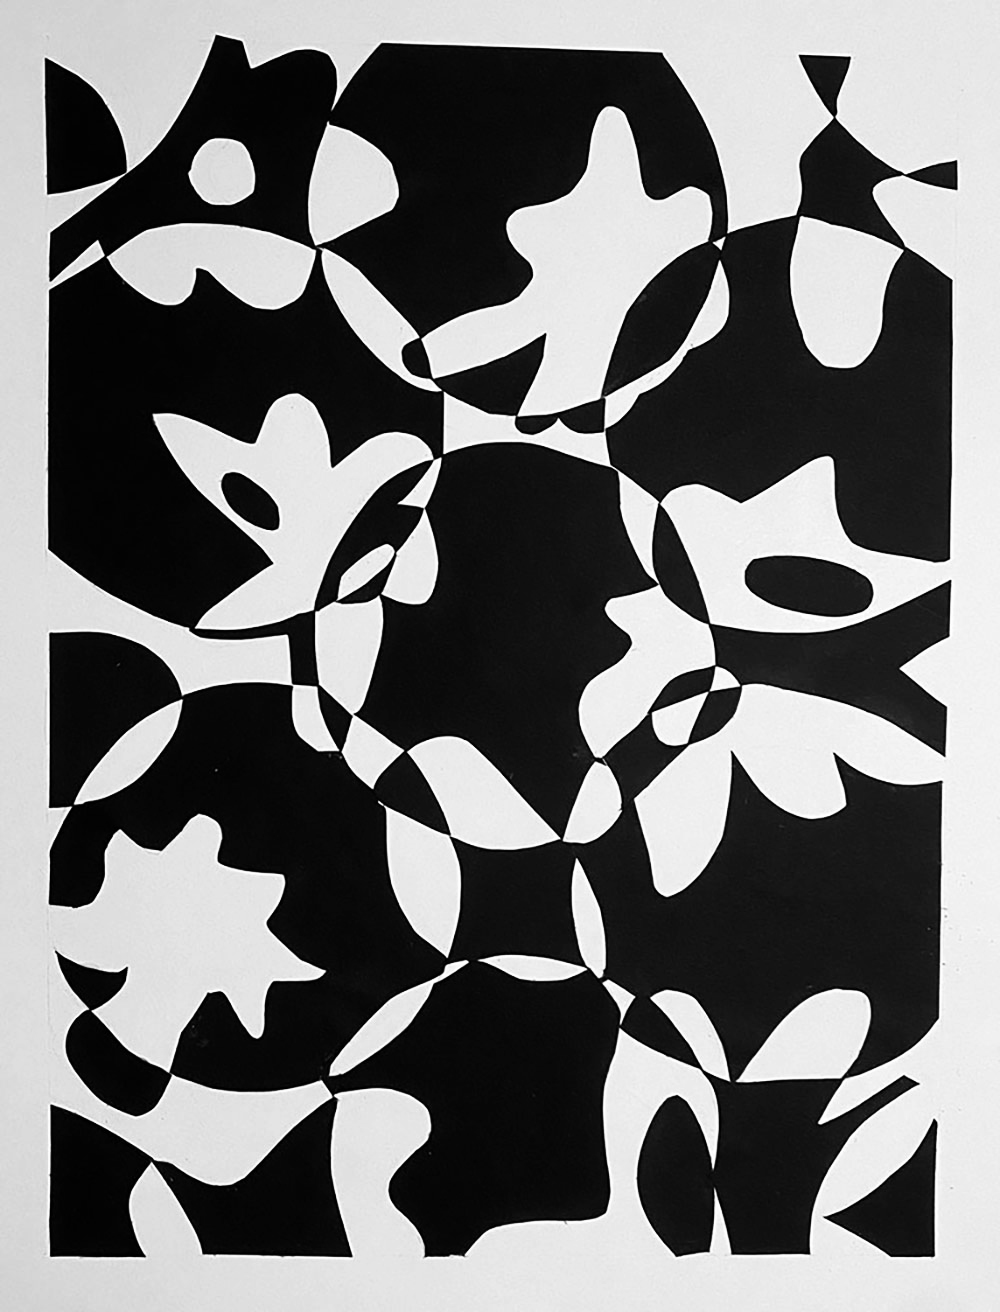
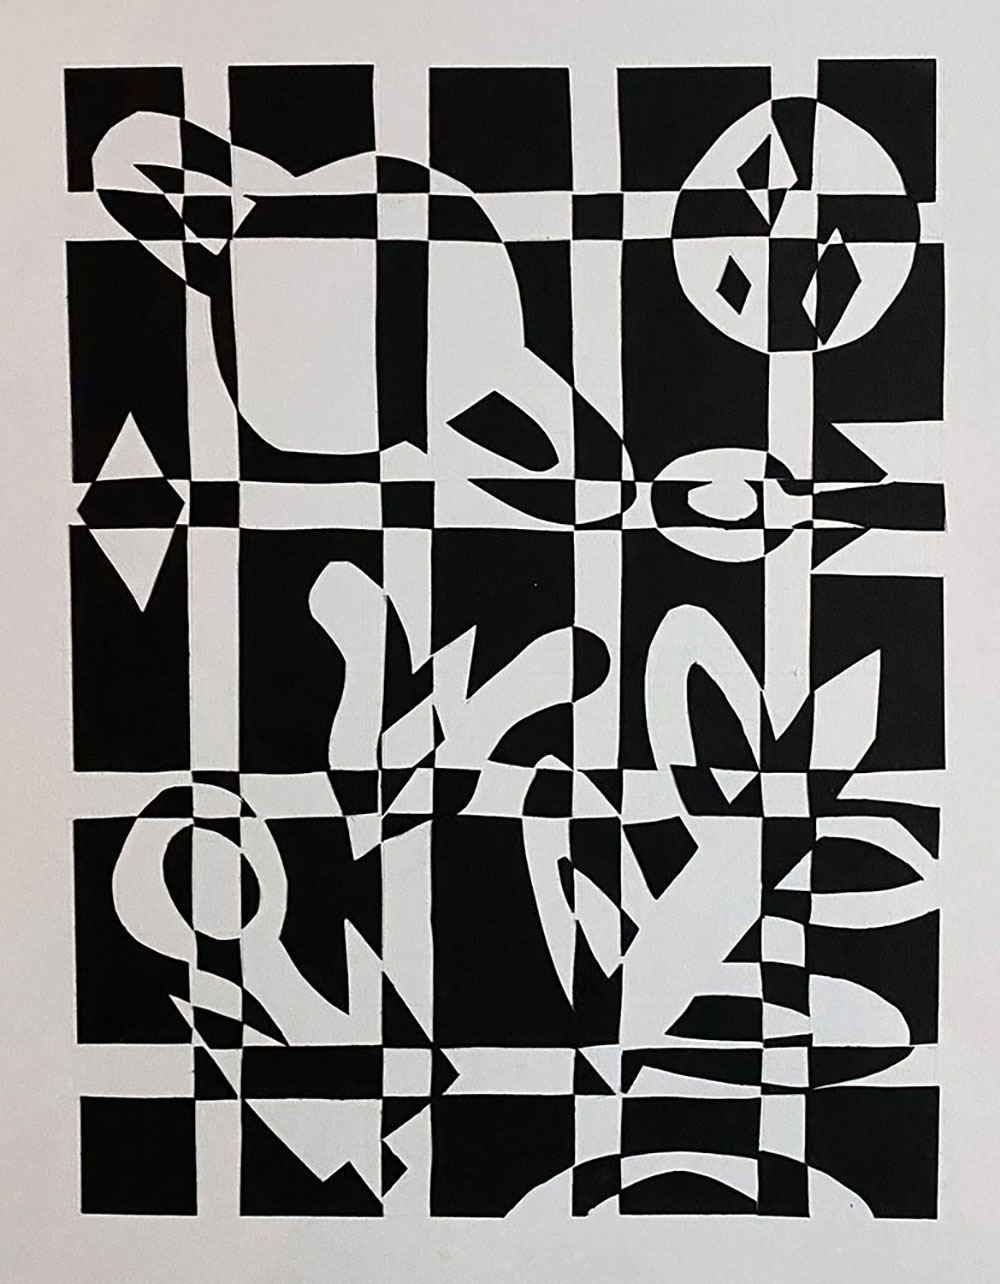
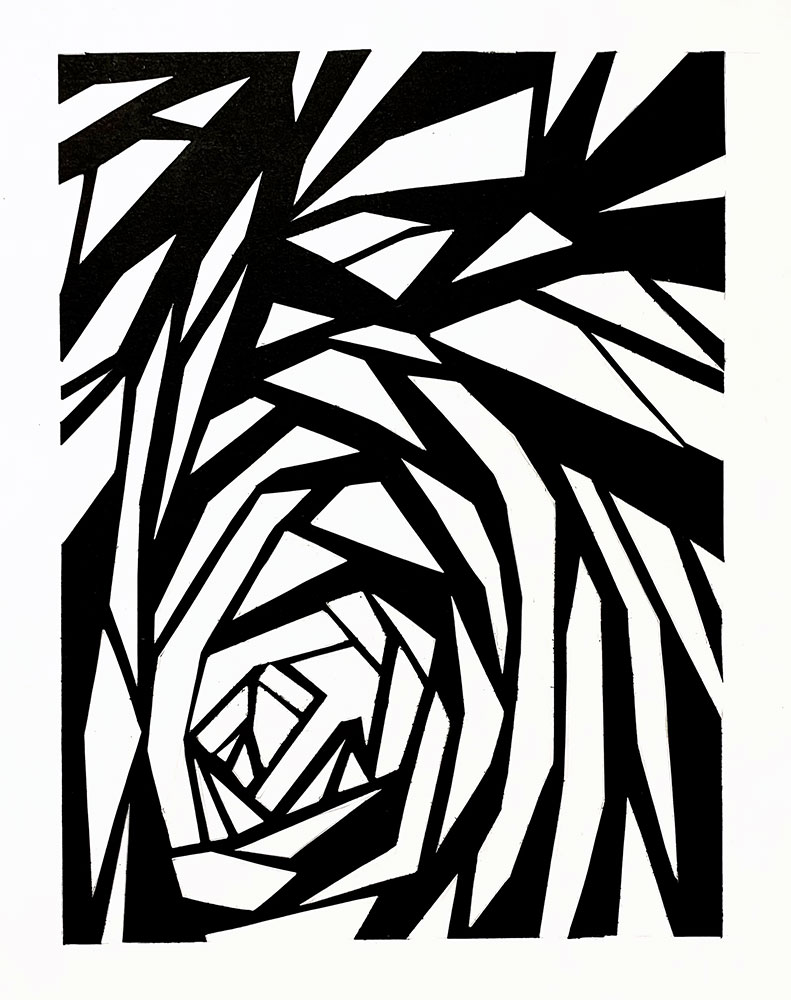
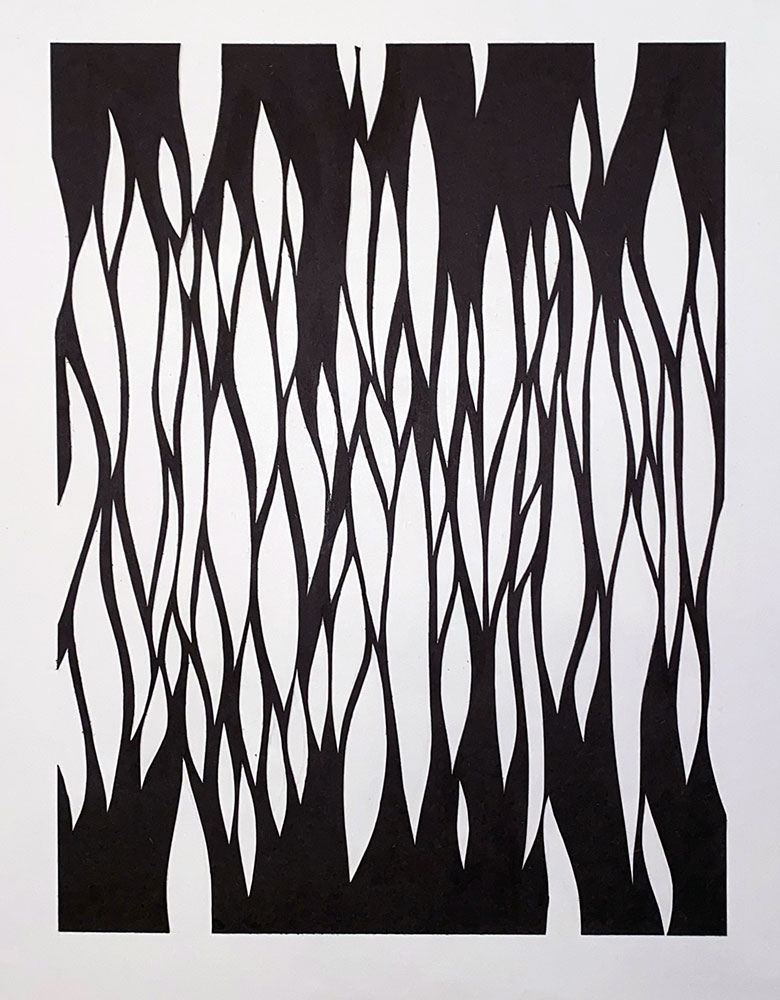
Shape
Create a shape-based composition using a grid plus a hybrid shape. Work with the grid to explore inversions of positive and negative. The final grid may be either 1) rectilinear, 2) organic/biomorphic, or curvilinear, or 3) combination (rectilinear plus organic or curvilinear). Final materials will be cut black construction paper on 14”x17” Bristol. The artworks will occupy 9x12 inches with a 2.5 inch boarder all around. Endeavor to create compositions that are balanced (not necessarily symmetrical), dynamic (full of movement), and harmonious.
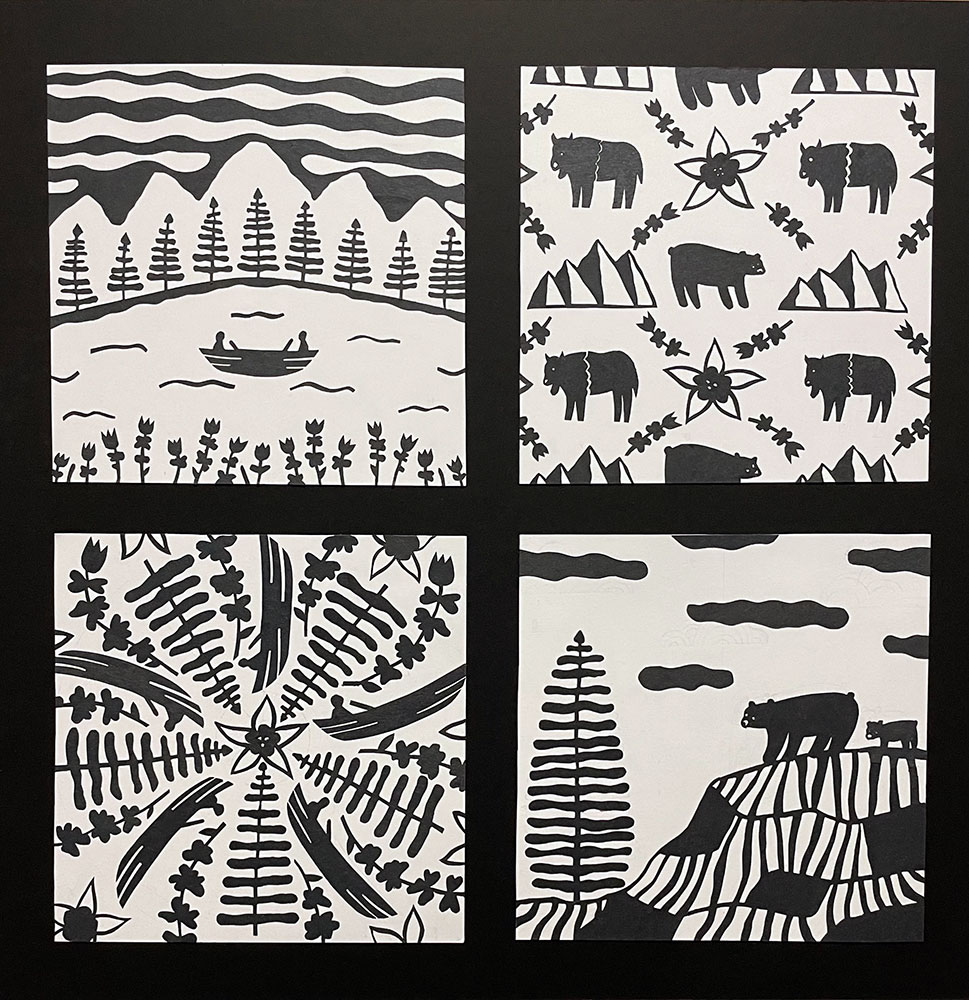
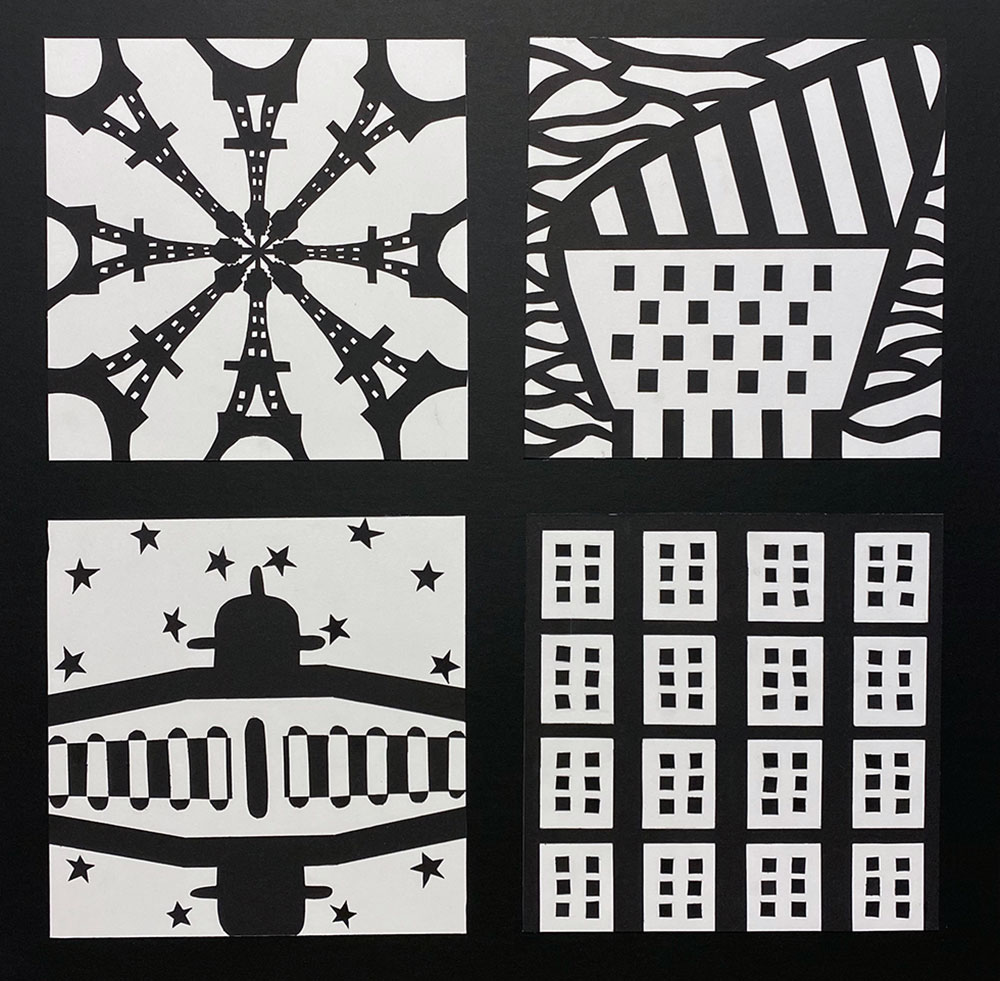
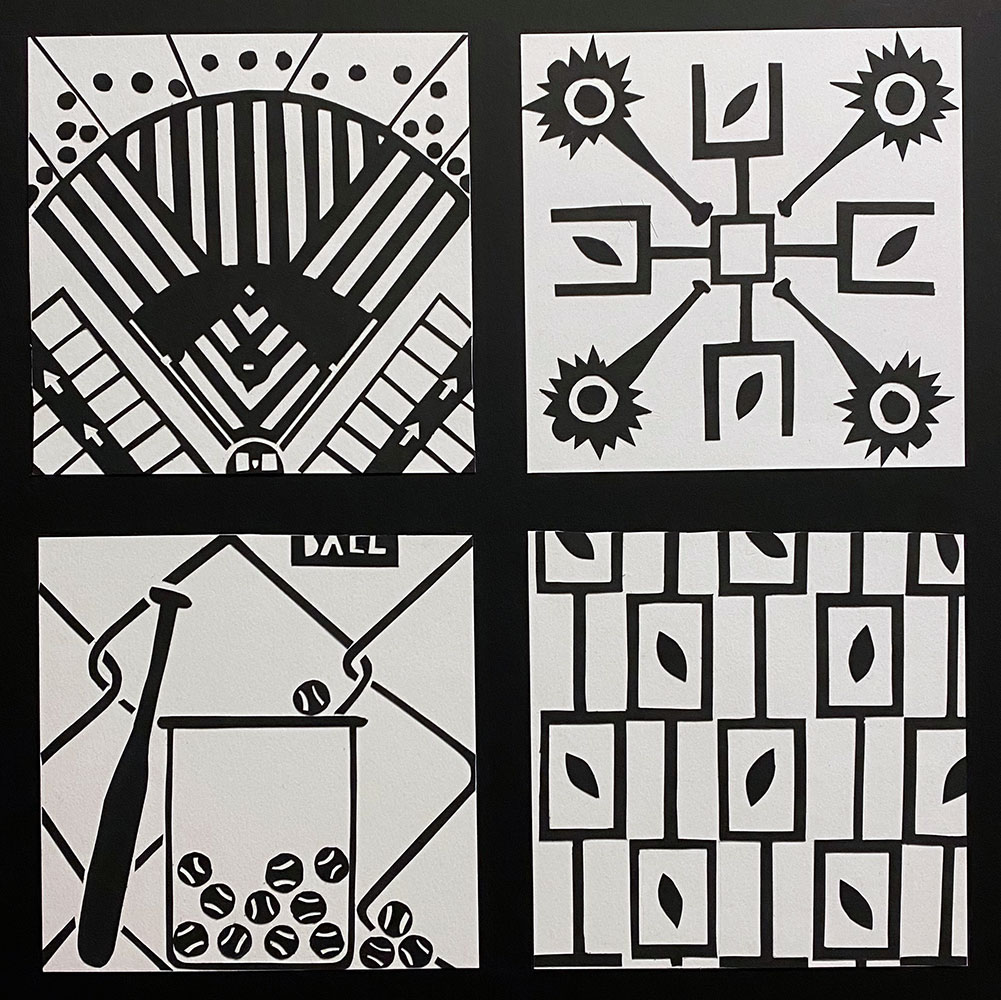
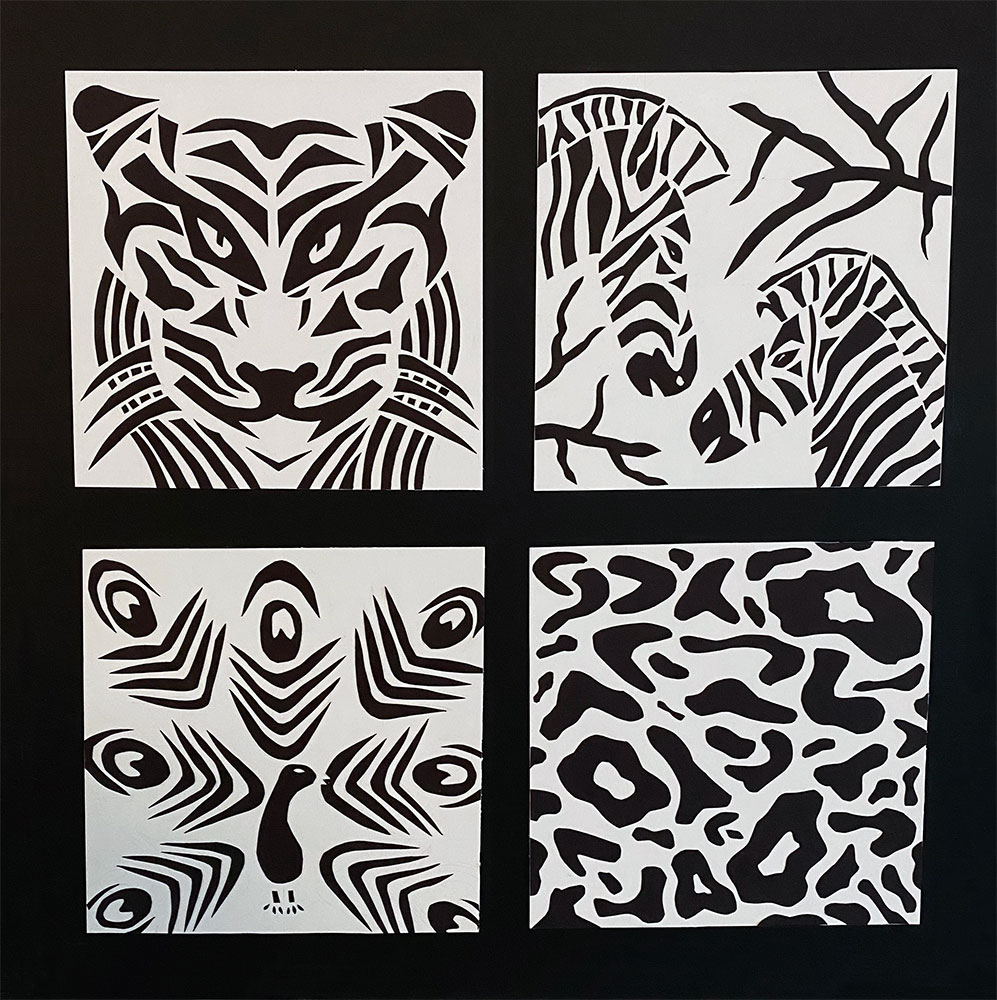
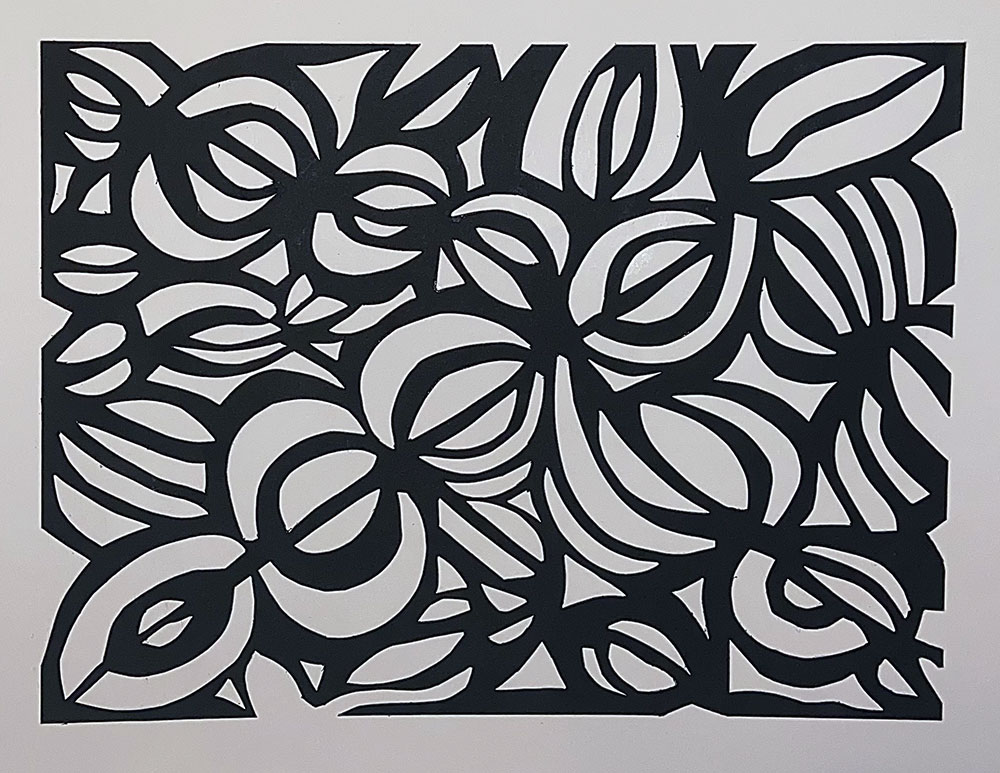
Balance
Working Method: This is a four-part project that will consist of four pieces, 8” x 8” each. The medium will be cut black paper on Bristol board which will then be mounted on illustration board.
Materials: illustration board (19” x 19”), Bristol board, black construction paper, rubber cement, x-acto, ruler, pencil and eraser, and possibly compass. Found imagery.
Your four pieces will work within one theme and will utilize the following compositional devices:
- Symmetrical Balance (can be approximate symmetry)
- Asymmetrical Balance
- Focal Point/Radial Balance
- All-over Pattern
Within those four compositions you must address a common theme and imagery.
- For your theme or concept I want you to think about a song or poem you like, and work within that framework to develop your four compositions. You will need to print out a copy of the song lyrics or poem to glue to the back of your piece.
- In your sketchbook, list imagery that you can pull from your piece. These do not have to be literal.
- Gather imagery that relates to your theme and the imagery in your song/poem. These can be from online, magazines, your own photography or drawings.
- Create at least 2, square (approximately 4” x 4”) thumbnail sketches for each of the 4, for a total of 8 thumbnail sketches, working out each of your compositions in black and white.
- After discussion, you will enlarge your thumbnails to full-sized rough. Since we will be using paper cutting as the medium you will need to have a set idea of how the piece will look before you cut your paper. This is not a very forgiving medium.
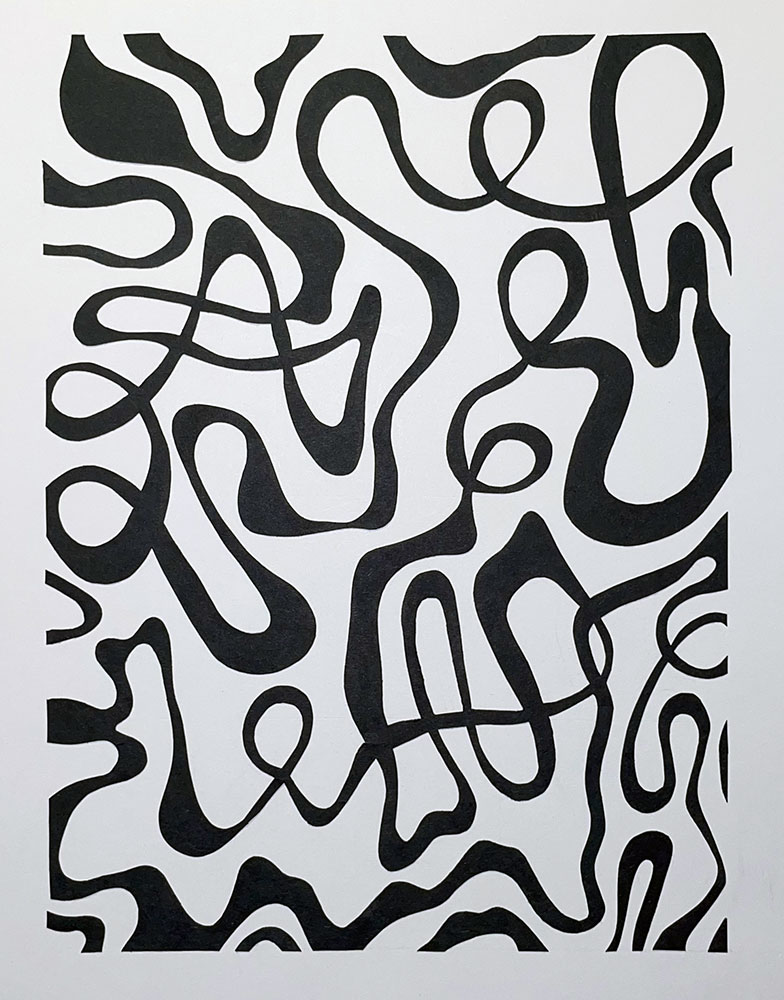
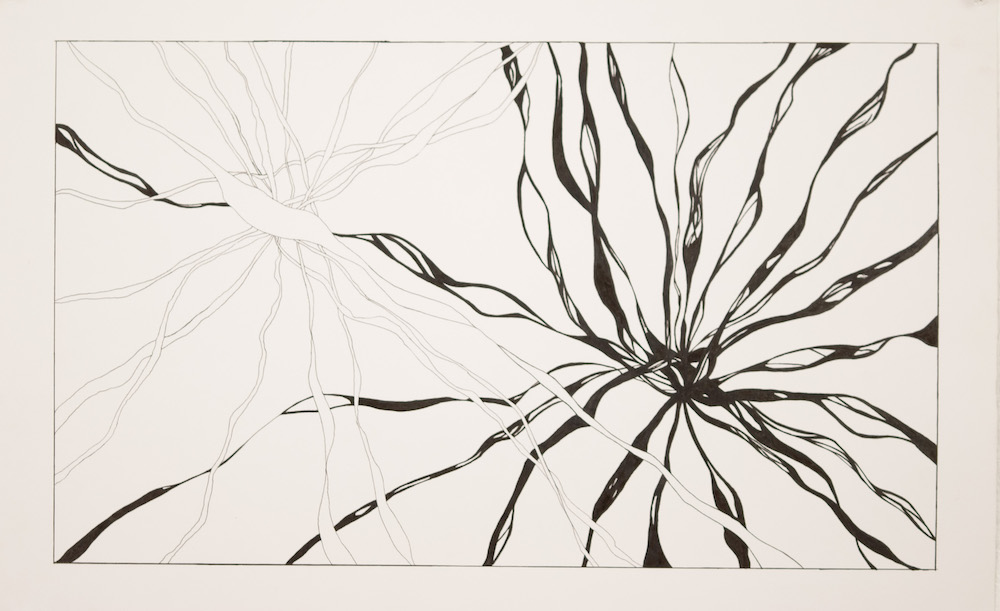
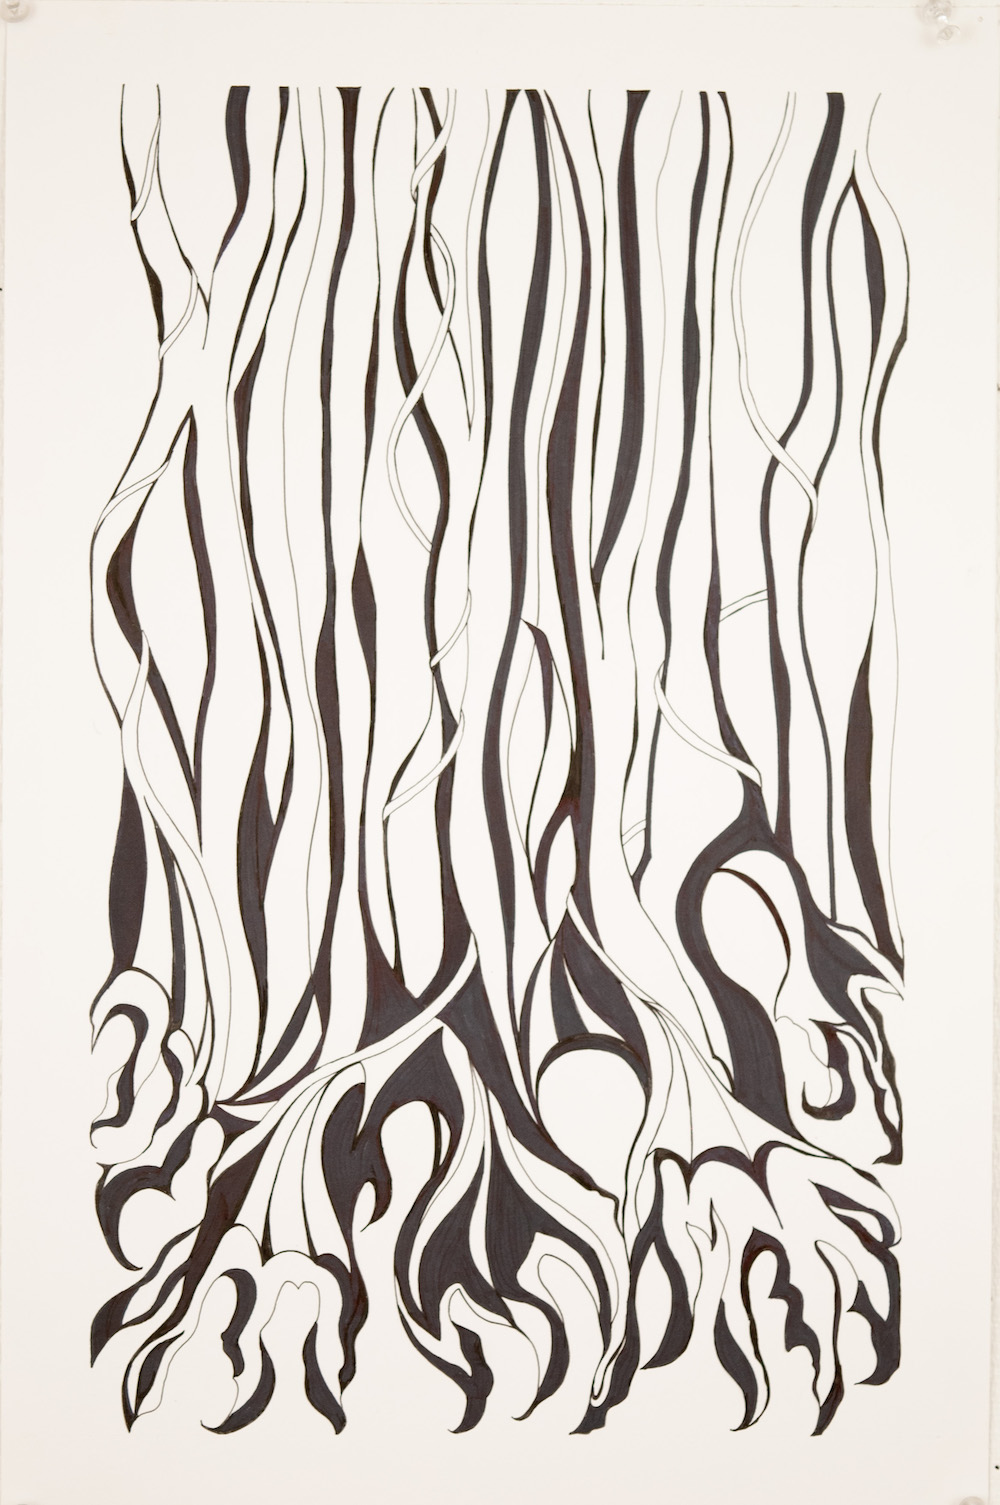
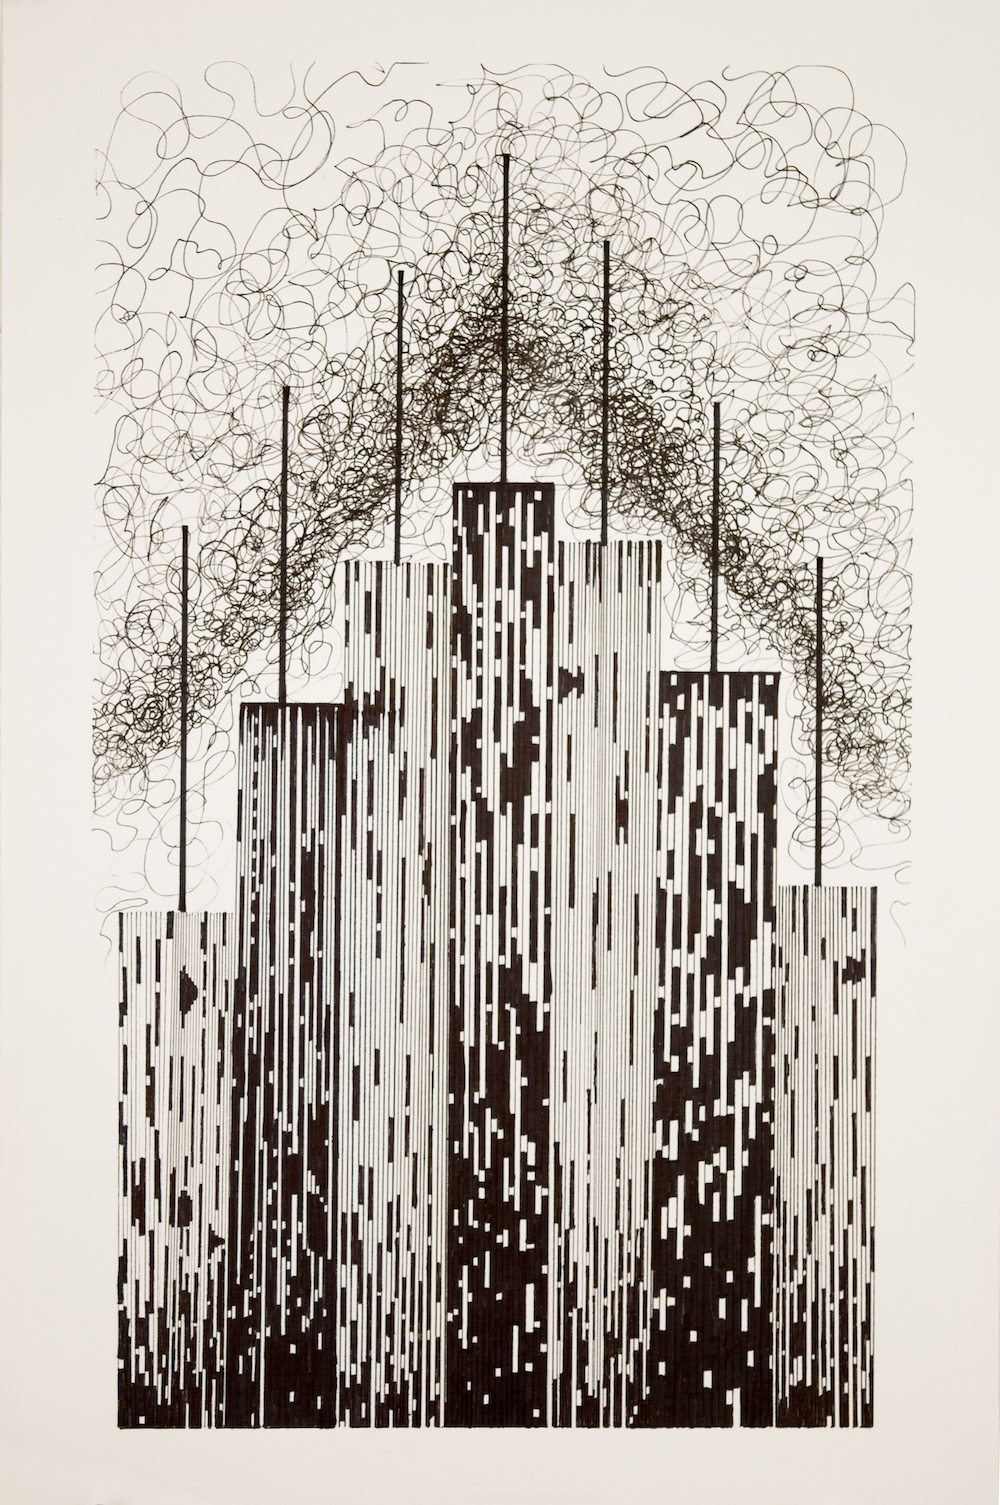
Line
Pen and ink/cut paper
Objective: Create a non-representational linear composition in pen and ink that represents your one-word response to the two articles you read.
Materials:
- Pencils and eraser
- Ruler
- White Bristol paper
- Sketchbook
- Micron pens and sharpies
- Artist’s masking tape
Texture
Project Specifications: To create and execute a design block, not unlike a quilt square, wherein you use your found and created textures in the place of fabric.
Creating your Textures
- You will make 5 pages of rubbed textures.
- You will make 5 pages of created textures (paint, pen and ink, pencil, sharpie)
- You will have 5 pages of black and white, full page printed textures.
Creating your Block Design
- Work with thumbnails (or small, trial versions of compositions) on your drawing paper or in your sketchbook to create and interesting pattern design. You can look to actual quilt patterns, you can design your own pattern, or a combination of both. You want your design to be complex enough to be interesting. Consider using a design that contains around 20 individual pieces. Keep your pattern simple, yet bold. Creating your design with textures and value will add interest and variety.
- When you have a pattern you like, enlarge it to create a full-sized rough (or full-sized rough version of your final). You should aim for a final piece of at least 14” x 14”.
- You may then want to create templates of your pieces in order to be able to recreate your block accurately. Keep a master copy of your piece so that you can lay out the texture pieces you cut where they will fit into your design.
- Divide your textures into groups of “light”, “medium”, and “dark” values. (see below)
- Then begin choosing where your textures will best work into your design. Keep contrast in mind. If you place textures that are too similar close together they will not create enough contrast. That is why we have divided our textures into value groups. You would not want to put two similar values next to one another. Step back from your design often to make sure your textures are all working well and that your pattern is still recognizable.
- When cutting your pieces out, I suggest you cut each piece slightly larger than it needs to be so that when you glue them down they overlap slightly so you do not see the paper behind them.
- Do not glue your pieces down until all the pieces are cut and the pattern is satisfactory.
- You may add borders if you think they will enhance the piece.
- You will be gluing your textures onto illustration board.
- Keep in mind precision and workmanship. You are working with a grid and a pattern. Any wobble or crooked line will be noticeable.
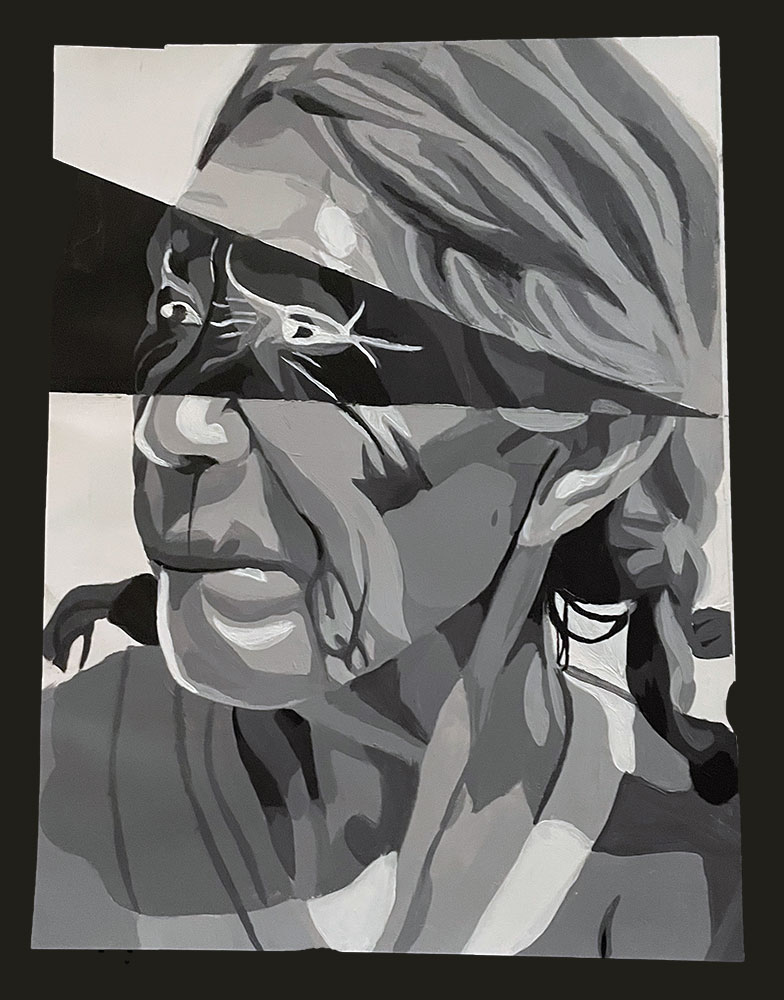
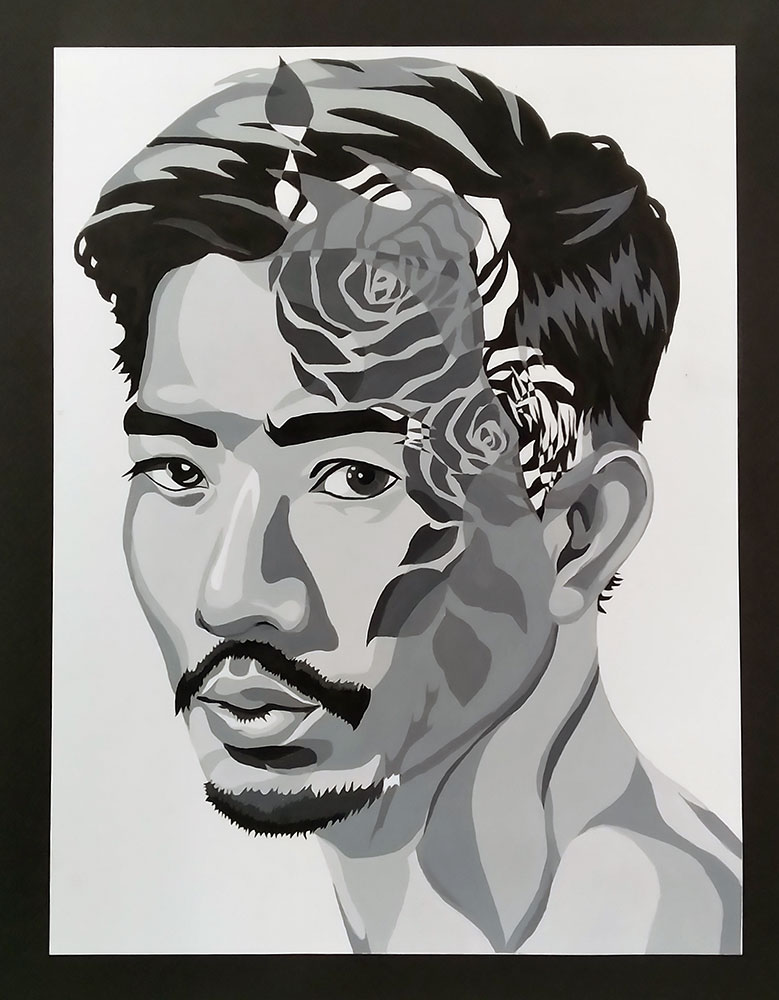
Value
Objective:
# 1: Using black and white acrylic paint, create an 8-step grayscale starting with white and moving to black.
# 2: Overlay shape(s) on a portrait to create an interesting composition. We will invert the image values within this shape(s). Use the 8 values created above to paint the portrait. Remember that there will be an opposite corresponding value within your shape overlay. This is like a paint by numbers. We are juxtaposing clear and distinct values, not blending them. The values in the portrait and shape(s) must be reduced to 8 distinct values.
Final must have minimum dimensions of 12 x 9 inches and maximum dimensions of 17 x 14 inches.
Choose black or white matte board to mount your final work with 2 inch borders all around.
Process:
Part 1: Practice value scales first in pencil and then in paint. For pencil, swatch different pencil weights and pressure first in your sketchbook until you have an evenly stepped scale of 8 distinct values. For paint, mix black and white paint for each of the 8 values. Use scrap bristol to test each value.
Step back and make sure each swatch is evenly spaced in value. You should not have two values that next to each other that look too similar nor another two that look drastically different. The difference between all 8 values should be equal - they should be evenly stepped.
After sufficient practice, use the “fancy template” (posted on Canvas) once you're sure each value is correct. The three columns of the “fancy template” will be completed and turned in with Assignment 5.

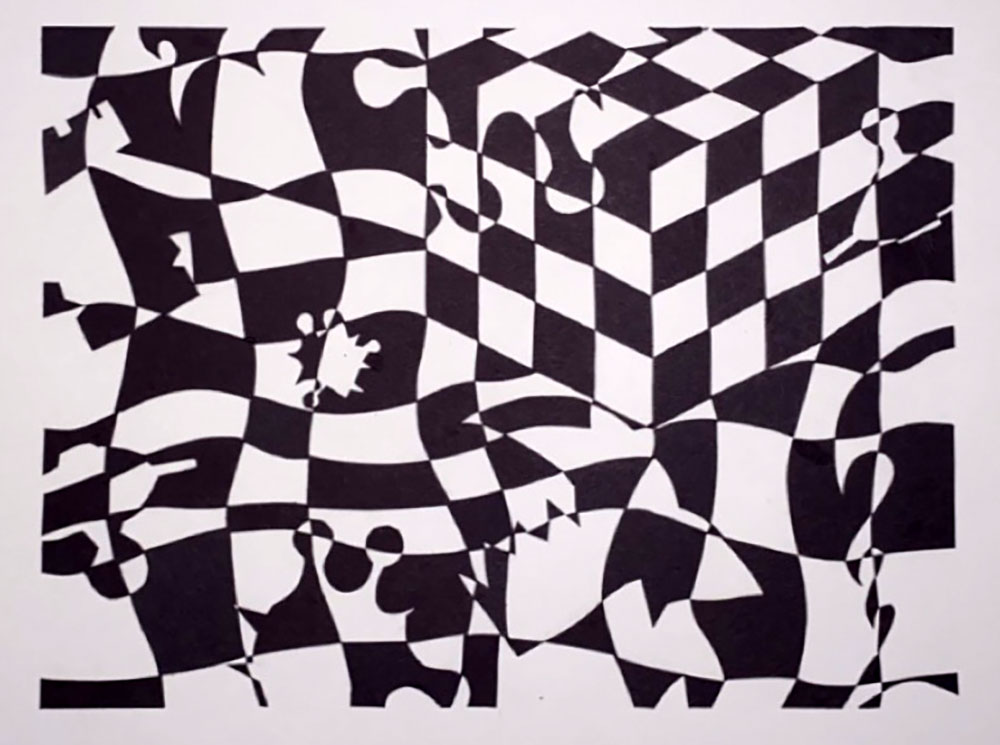
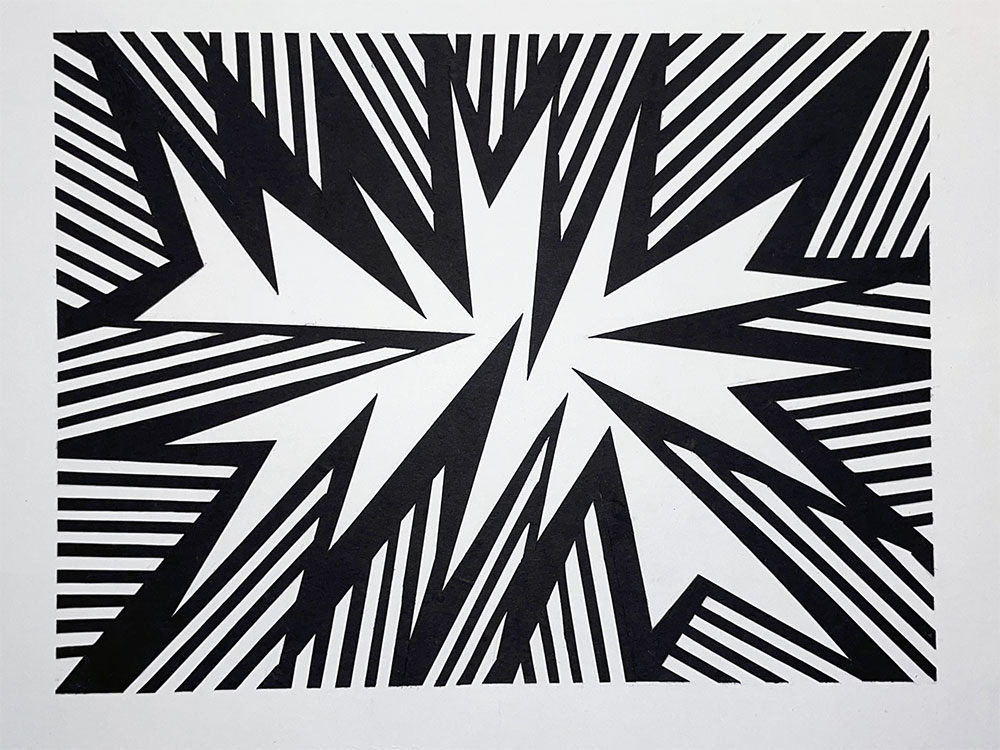
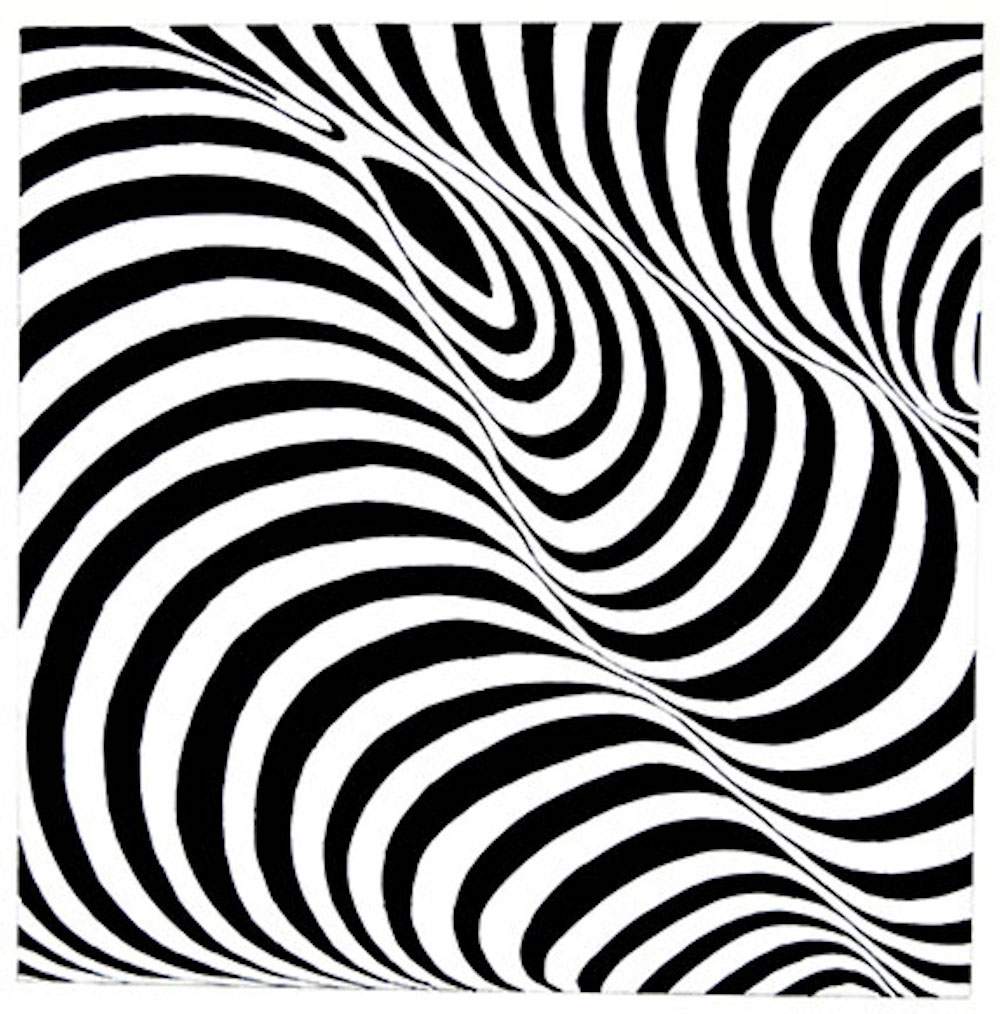
Space Warp
Objective:
To show how lines can be used on a flat page to create an illusion and feeling of swelling or warping of the surface.
Directions:
You will start by using only straight lines. A second drawing will be done using only curved lines. Both drawings are to achieve similar goals: space warpage.


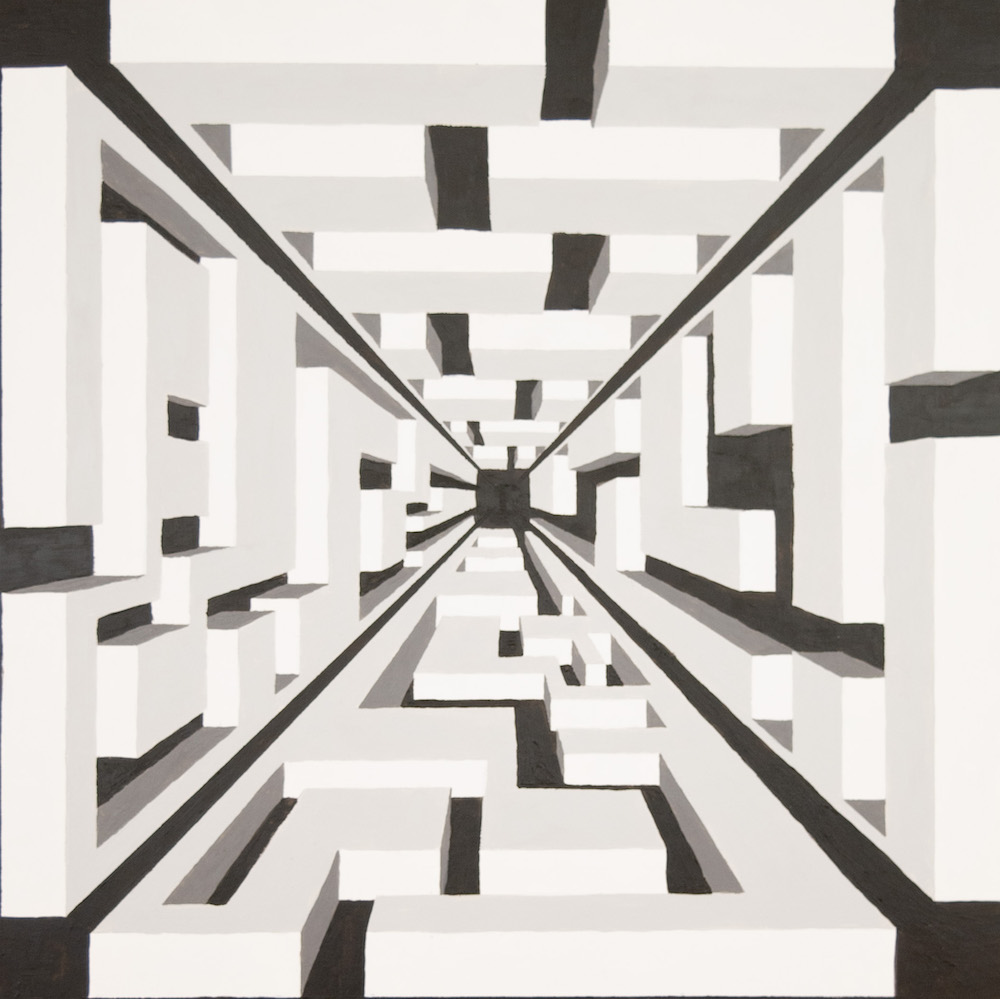
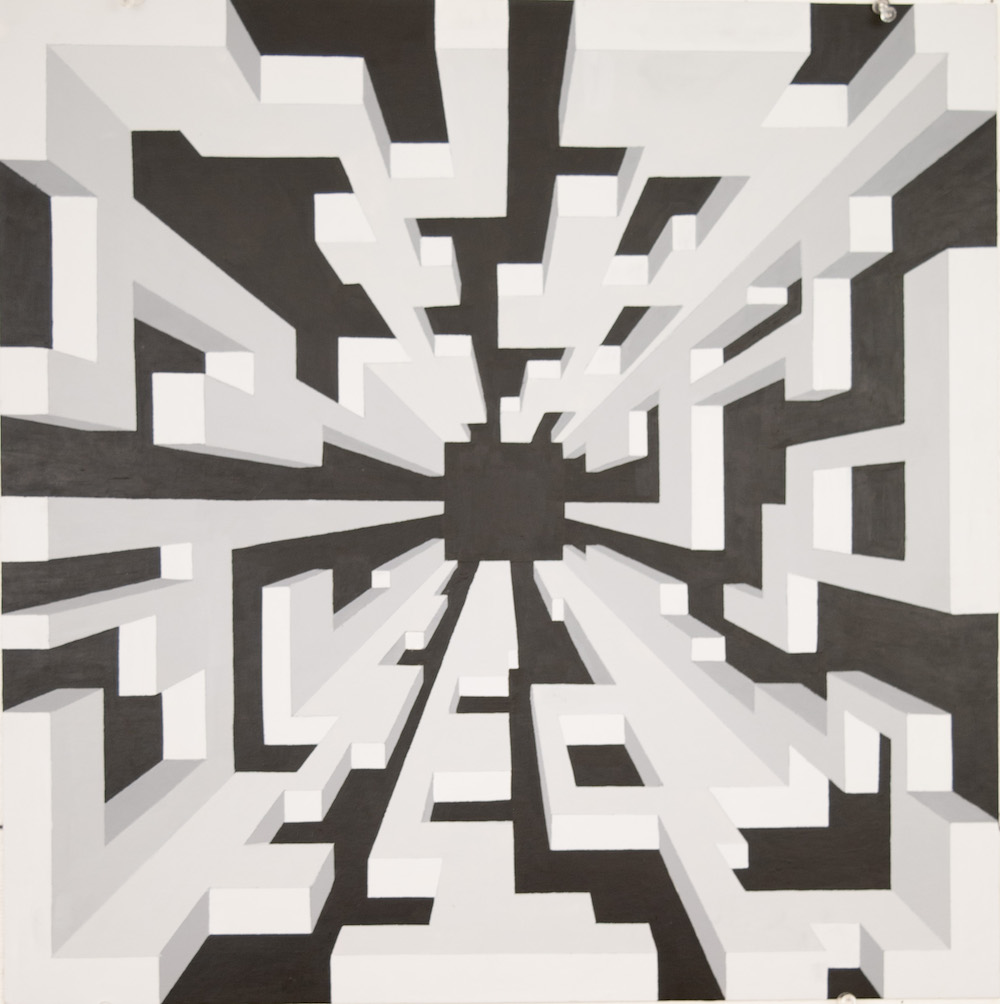
Space Maze
You will be creating an imaginary 4-sided, one point perspective “maze” floating in space. Begin by placing your Vanishing Point near the middle of your page. Do this by dividing your format in half diagonally both ways. The point where both lines intersect becomes the vanishing point.
You will complete each triangular quadrant of the maze at a time
- Start by drawing the front plane of your labyrinth
- Remember the lines that are parallel to the bottom of your page will be straight.
- The lines that are perpendicular to the bottom of your page will all recede toward the vanishing point.
- Continue your labyrinth on the sides and top of your painting so that the viewer feels as if they are looking into a box or room in which all the sides are labyrinths.
- You will then enhance the sense of perspective by using a variety of values: Black, white, and in between, in acrylic paint, using hard-edged painting technique (mask off lines with artist’s tape).
- The design of your labyrinth is completely up to you.
- Size: 18 x 18

Rythmn, Repitition, Movement, and Pattern
In this project the student should synthesize all that they have learned about the Elements and Principles of Design with a focus on Rhythm, Repetition and Pattern. After laying out their composition and completing the required visual research and gathering patterns. They will fill in the various shapes created by their compositions with their gathered patterns. They must keep balance in mind and pay attention to the arrangement of patterns in terms of their scale, value, and texture and use patterns with a variety of shapes and lines.