Printing and Plotting
Please check back for information on the printing and plotting lab hours and additional resources.
Shop
For questions about the shops, please contact Scott Hudspeth, shudspeth@caad.msstate.edu or 662.325.2548
Laser Cutter
Signing up for a time slot:
The laser cutter is available to architecture students. Each time slot is 15 minutes. Students are allowed a maximum of 4 time slots (1 hour) per day, no exceptions. Each time slot costs $5, paid via MoneyMate at the end of your scheduled time. Note: You will not be able take what has been cut until you have paid in full.
Schedule time to use the Laser Cutter.
What can you cut?
Shop staff must approve of any/all non-stock materials BEFORE cutting.
- Acrylic – up to .25”
- Basswood – up to .25”
- Plywood – up to .125” – 3 ply only
- Chipboard – up to .125”
- Masonite – up to .125”
- Cork Sheet – up to .25”
- Paper, Mylar, Velum
- Leather
- Glass etching
Note: All materials cut exponentially slower as thickness increases.
Setting up your file:
Proper formatting of your laser cut file is essential for efficiency. Failure to set up your file according to these guidelines will slow down the shop technician, resulting in less time for your file to be cut.
When you show up to your appointment, it is essential that you have all your material cut down to the proper dimensions and have your file saved on a USB jump drive as a .dwg file from AutoCAD 2019 or earlier. If you do not have your material or file ready, it will cut in to the amount of time you have reserved. Please note that the wood shop is not always open during laser cutter appointments, so you may not be able to cut your material immediately before your appointment.
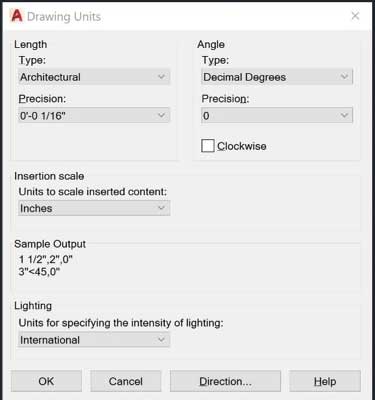
Your file should be set up using the standard architectural units. To change the units in your file, use the command “units” and select architectural from the dropdown menu labeled "Type."
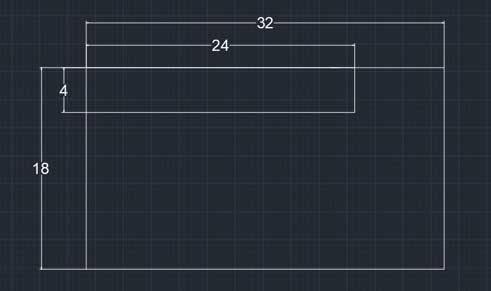
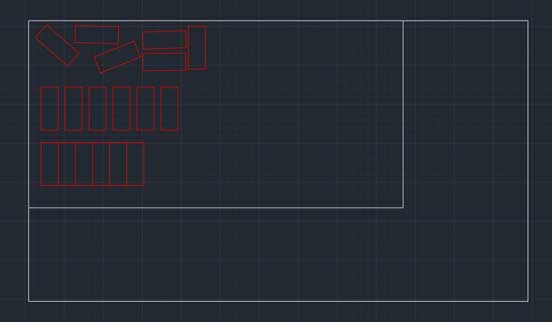
The bed of the laser cutter should be drawn in white for each piece of material you intend to cut. The size of the bed depends on which laser cutter you have signed up for. Laser 1 and 2 are 32”x18” and Laser 3 is 24”x18”. The bed of the laser cutter should always be drawn in landscape orientation. After drawing the laser bed, draw your material in white positioned in the top left corner of the laser bed. In the image below, the 32”x18” laser bed is drawn with a 4”x24” piece of basswood in it. Note: the fabrication lab uses AutoCAD with a black background. Any lines drawn in black will not be seen by the laser technician.
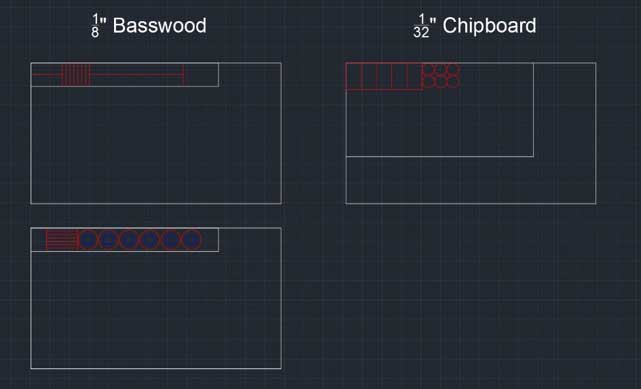
Each piece of material you are cutting from will need to be drawn inside of the bed of the laser cutter. If the material is the same as the previous, cut place it below the first cut; if the material changes, make a new column and label the material. In the image below, the first two cuts are on 1/8” basswood, and the third cut is on 1/32” chipboard
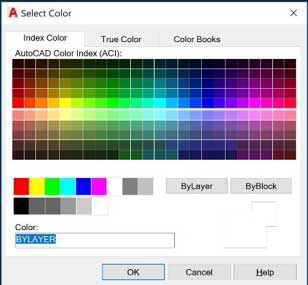
The laser cutter uses different colors to indicate which elements are to be cut and which are to be etched. Elements needed to be cut must be drawn in red (255,0,0), and those intended to be etched must be drawn in blue (0,0,255). These lines will not be visible to the laser cutter unless they have a line weight of 0.00 mm. Anything drawn in a different color or line weight than specified above will not be recognized by the laser cutter and will not be cut.

An efficient layout of the pieces you are cutting will allow the laser cutter to complete the cut quicker while also wasting less material. The image below indicates how to properly arrange your cut so to reduce the amount of material and cut time needed.
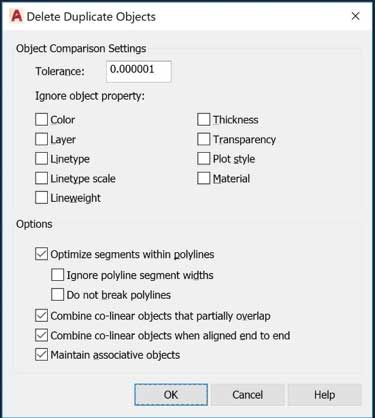
After arranging your pieces efficiently, you may have lines that are overlapping. The laser will cut lines that overlap twice, which could result in the burning of your material. To fix this, select all the items you are cutting, type the command “overkill” and click "enter." A "delete duplicate objects" dialogue box will appear like the one in the image below; click "ok." All overlapping lines should now be removed.
Keep in mind:
The laser can cut without any margins, allowing for you to cut pieces on the edge of your material. However, if your material does not have perfectly square edges this could result in your pieces not being cut correctly. If your material is not perfectly square, you should move your pieces inside the border of your material in order to ensure the entire piece gets cut out.
Cutting any piece that is smaller than 1/8” is not recommended. These pieces will most likely burn up completely or fall through the bed of the laser cutter.
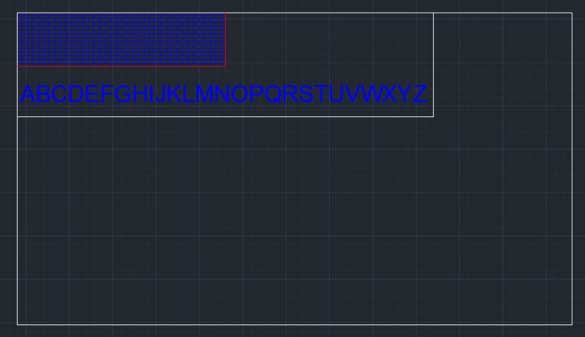
The laser also can raster engrave, which allows for elements that are hatched to be completely engraved (ex. words or brick hatches). This, however, takes a significant amount of time to complete. These elements should be used sparingly. If you are engraving brick or any other material hatch, it is recommended you scale up the size of the hatch for better visibility and quicker engraving. Note: using the command “txtexp” will give you just the outline of the letters, significantly shortening the amount if time it takes to cut.